Last updated on August 24th, 2025 at 03:24 pm
Bromeliad Care Made Easy: Your Guide to Thriving Indoor Plants
Bromeliad care made easy. They are some of the most striking indoor plants you’ll find. Known for their bold colors and tropical looks, they’re perfect for adding a pop of life to your space. These plants are not just about good looks—they’re also surprisingly easy to care for, making them a favorite for beginners and seasoned plant lovers alike. Originating from tropical climates, bromeliads adapt well to indoor environments, thriving with minimal fuss. If you’re curious about other eye-catching plants, check out Houseplants Las Cruces.
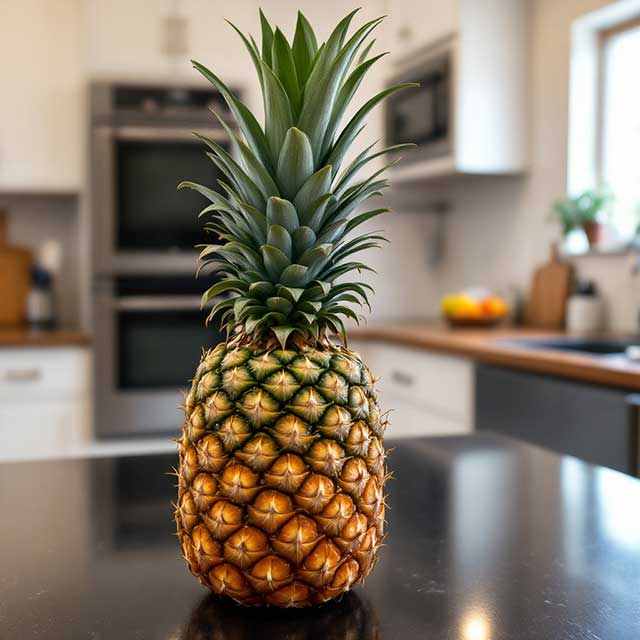
One unique fact is that Pineapples are bromeliads and the only ones producing fruit. Also, Bromeliads are not toxic to cats or dogs.
What Makes Bromeliads Unique
Bromeliads stand out in the plant world for several reasons, but their most striking features are their rosette shape and “water tank” system. The rosette—a circular arrangement of leaves—provides the plant with a natural reservoir. This “tank” collects water and nutrients, mimicking how bromeliads hydrate themselves in the wild. Cool, right? This feature lets you water them right in the center without overthinking it.
Another incredible feature is their colorful bracts which are often mistaken for flowers. These bracts can come in eye-popping shades like red, pink, or orange and can last for months. While the actual flowers of a bromeliad are short-lived, their bracts steal the show every time.
Additionally, bromeliads are epiphytic by nature. This means they can grow on trees or rocks instead of soil. While yours will likely sit in a pot indoors, their epiphytic origin makes them uniquely low-maintenance compared to other houseplants.

Popular Indoor Bromeliad Varieties
If you’re wondering which bromeliads are perfect for indoor care, you’ve got plenty of options. Here are three popular choices that strike the perfect balance of beauty and easy maintenance:

- Guzmania: These bromeliads are loved for their vibrant bracts that come in fiery orange, deep red, and even bright yellow. They thrive in indirect light and can add a bold splash of color to any room.
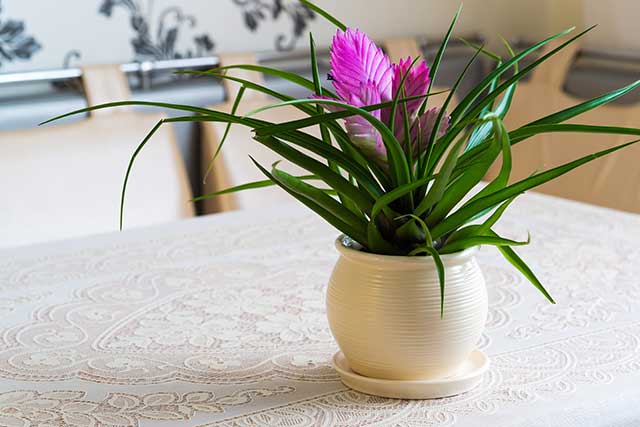
- Aechmea: Known for their silver-green leaves and striking pink flower heads, Aechmeas make a strong visual statement. They’re hardy and can adapt well to indoor environments.
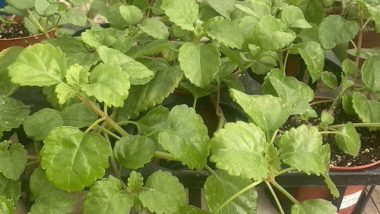
- Tillandsia: These are perfect if you prefer plants with more foliage interest. Tillandsia features bold colorful flowers. They like bright indirect sunlight and are considered air plants.
Each of these varieties can thrive indoors with just a bit of attention, making them a fantastic addition to your indoor plant lineup. Curious to discover more tropical plants that thrive easily indoors? Check out Houseplants Las Cruces for ideas and inspiration.
Bromeliads are not just plants; they’re a conversation starter and a piece of tropical elegance in your home.
Optimal Growing Conditions for Bromeliads Indoors
To successfully care for bromeliads indoors, it’s essential to create an environment that mimics their natural habitat. These plants thrive in tropical settings, so replicating factors like light, temperature, and humidity can make all the difference in keeping your bromeliads happy and healthy. Let’s explore the key components of their growing conditions.
Lighting Requirements
Bromeliads love bright, indirect light. It’s their sweet spot. Think of the light filtered through a thin curtain or the dappled sunlight under a forest canopy—this is what bromeliads need. Place your bromeliads near a south-facing window for optimal light exposure, but be careful not to expose them to direct sunlight, which can scorch their vibrant leaves.
If your home doesn’t provide enough natural light, no worries! Artificial grow lights are a great alternative and can keep your bromeliads thriving year-round. Position the grow light about 12-24 inches away and use a timer to achieve 8-12 hours of light per day. It’s a simple fix for darker rooms or cloudy weather.
Temperature and Humidity
Bromeliads feel right at home in temperatures between 60°F and 80°F. If you’re comfortable in your space, chances are your bromeliads will be too. Avoid placing them near drafty windows, air conditioners, or heating vents, as extreme temperature changes can stress the plant.
Humidity, on the other hand, might require some adjustment. Bromeliads prefer a humidity level of around 50%-70%, similar to their tropical origins. If your indoor air is too dry, especially during winter months, you can increase humidity with these methods:
- Mist the leaves a few times a week with water.
- Use a humidifier to maintain consistent moisture in the air.
- Place a shallow tray of water with pebbles near the bromeliad. As the water evaporates, it adds humidity without overwatering.
These steps can go a long way in creating a cozy, tropical vibe for your plant.

Watering Bromeliads
Watering bromeliads might seem tricky at first, but believe me, it’s easier than it sounds. These plants have a unique central cup, also known as a “tank,” formed by their rosette of leaves. This cup is where you should primarily add water. Use filtered or rainwater for best results, as tap water can sometimes contain chemicals that bromeliads don’t appreciate.
Here’s the trick: Keep the central tank filled with water, but don’t let it sit stagnant. Empty and refill the cup regularly to prevent bacteria or mold from developing. And while it’s tempting to water the soil, bromeliads don’t need much moisture there—soil should be slightly damp but never soggy.
Overwatering can be a big no-no. Too much water can cause root rot, so let the potting medium dry out a bit between waterings. Remember, bromeliads absorb most of their moisture through the tank and the air around them, not from their roots.
Implementing these steps will ensure your bromeliads thrive with minimal fuss. By offering the right balance of light, temperature, humidity, and water, you create an environment where these tropical beauties can shine indoors. If you’re curious about other easy-to-care-for plants, take a look at Houseplants Las Cruces for inspiration.
Fertilizing Bromeliads
When it comes to feeding bromeliads, less is more. These plants thrive without heavy fertilization, so there’s no need to overdo it. Use a water-soluble fertilizer, ideally diluted to about a quarter of the recommended strength. Apply it sparsely—every few months during the growing season should be enough.
A key thing to remember? Never pour fertilizer directly into the central tank of the bromeliad. Doing so can lead to buildup, which might harm your plant. Instead, lightly spray the fertilizer onto the leaves or the soil around the base to give them the nutrients they need without overwhelming them.

Managing Pests and Diseases
Like any houseplant, bromeliads can occasionally face pests and illnesses. Common invaders include:
- Mealybugs: These small white pests can cluster on the leaves, sucking sap from the plant.
- Scale insects: They appear as tiny bumps that can damage the foliage over time.
- Root rot: Often caused by overwatering or stagnant moisture, especially in the central tank.
To protect your bromeliad, take a preventative approach. Regularly check the leaves and tank for signs of insects and keep the plant’s environment clean and optimized. If pests show up, a gentle spray of soapy water or a neem oil solution can take care of the problem. And remember, refreshing the water in the central tank often keeps fungal growth at bay.
Pruning and Cleaning
Think of pruning as grooming your bromeliad. Not only does it improve their appearance, but it also encourages health. Over time, you’ll notice dead leaves or spent flowers—these should be removed promptly. Use clean, sharp scissors to snip them off at the base.
Routine cleaning is equally essential. Dust can collect on the leaves, particularly indoors, which may interfere with the plant’s ability to photosynthesize. Occasionally, wipe the leaves with a damp cloth and remove any debris from the tank. This simple upkeep keeps your bromeliad looking vibrant and healthy.
By incorporating these maintenance tips, you’ll set your bromeliad up for a long and lush indoor life. They’re not just houseplants—they’re living art pieces that transform any room.
When to Repot a Bromeliad
Repotting a bromeliad is something you’ll only need to do occasionally. Unlike other houseplants, bromeliads have smaller root systems, so they’re perfectly happy staying in the same pot for extended periods. However, there are some key moments when repotting becomes necessary:
- When the plant outgrows its container.
- After its blooming phase (when pups start to emerge).
- If the potting mix becomes compacted or loses its draining ability.
When it’s time to repot, choose a porous and well-draining potting medium. Bromeliads thrive in mixes designed for orchids or succulents—a blend of bark, perlite, and peat moss works like a charm. Avoid dense soils as they trap too much moisture and can lead to root rot. And don’t forget to pick a container with drainage holes to keep things flowing! Looking to improve your potting game? Check out plants that also thrive indoors, like bromeliads, at Houseplants Las Cruces.
Propagating Bromeliads Using Pups
Propagation may sound complicated, but with bromeliads, it’s as simple as harvesting what nature provides—pups! These are the baby bromeliads that grow from the base of the mother plant after it blooms. Separating and replanting pups is a rewarding way to grow your collection.
Here’s how to do it:
- Wait for the Right Size: Don’t rush! Let the pups reach one-third to half the size of the mother plant before removing them.
- Gather Tools: Use a clean, sharp knife or clippers to avoid damaging the plant.
- Carefully Separate: Gently cut the pup away from the mother plant, keeping some of the roots intact.
- Prepare a New Pot: Fill a small container with the same type of well-draining mix mentioned above. Place the pup in the center and secure it in place.
- Water Sparingly: After planting, mist the pup lightly and ensure the soil stays slightly damp.
Pups are independent but need a stable environment to grow. Keep the new pot in a warm, humid area with indirect light, just like the care you’d provide for a mature bromeliad. Over a few months, these baby plants will flourish into stunning tropical beauties!
Common Challenges with Indoor Bromeliads
Even though bromeliads are low-maintenance plants, they aren’t completely problem-proof. Indoor care can sometimes present challenges, but don’t worry—most issues have simple fixes. Below, we’ll tackle some of the most common bromeliad problems and how to solve them.
Brown Leaf Tips
If you’ve spotted brown tips on your bromeliad’s leaves, it’s a sign that something isn’t quite right. This issue is usually caused by under-watering or low humidity levels. Think of how these plants thrive in tropical rainforests—they love a bit of moisture in the air.
Here’s how you can address it:
- Check Watering Habits: Bromeliads don’t like to dry out completely. Keep the central tank filled with water and maintain damp (but not soggy) soil.
- Boost Humidity: Dry indoor air, especially in heated spaces, can be rough on your plant. Place a shallow tray of water nearby or run a humidifier to create a more plant-friendly environment.
- Cut Wisely: If tips have already browned, grab some sharp scissors and trim the affected areas. It’s like giving your bromeliad a fresh haircut.
By tweaking your watering and creating a more tropical vibe, those pesky brown tips will be a thing of the past.
Faded or Dull Leaves
Bromeliads should always flaunt vibrant and eye-catching foliage. If your plant’s leaves look faded or dull, it’s likely due to insufficient light. Bromeliads love bright, indirect sunlight—much like the dappled light they’d get under a rainforest canopy.
Here’s how to revive their shine:
- Relocate to Bright Light: Move your bromeliad near a well-lit window with plenty of indirect sunlight. Avoid placing it in direct sun, as that can scorch the leaves.
- Consider Grow Lights: If you lack natural light, artificial grow lights are an excellent backup.
- Regular Dusting: Sometimes, leaves lose their shine because of dirt or grime. Use a damp cloth to clean them and allow photosynthesis to work its magic.
While light adjustments and regular cleaning take a bit of effort, they go a long way in restoring your bromeliad’s vibrant charm.
By keeping an eye on light and humidity levels, you can prevent these common problems from taking the tropical vibe out of your bromeliads.
Conclusion
Bromeliads bring effortless beauty and a slice of the tropics right into your home. Their bold colors, low-maintenance needs, and unique features make them a standout choice for anyone, from plant newbies to seasoned indoor gardeners.
If you’re ready to enhance your space with bromeliads or explore other vibrant houseplants, check out Houseplants Las Cruces. Fill your home with life and style while keeping plant care stress-free.

Greenhouse Manager, Master Gardener, and Webmaster.
If you have any questions or enjoyed this post, feel free to share your thoughts in the comments below.