Last updated on August 10th, 2025 at 10:37 am
Collect Seeds Simple Steps for Every Gardener
How to Collect Seeds from Flowers. You don’t have to keep buying seeds every season. When you collect seeds from your favorite flowers, you can save money, grow reliable plants, and keep special varieties going in your garden. Gardeners of all ages find it fun and rewarding, plus you get to watch the whole life cycle from start to finish.
Anyone with a flower bed or a few pots can start collecting seeds. This helps you grow exactly what you love, year after year, while sharing seeds with friends and neighbors. You’ll also help protect unique flowers that might be hard to find in stores. Collecting seeds just takes a little patience, and the payoff is worth it if you enjoy seeing your garden return each spring.
Check out this helpful video if you want to see how easy it is: How to Collect Seeds from Flowers and Herbs: A Simple Way to Save Money!
Why Collect Seeds from Your Flowers?
Good question. Collecting seeds from your own flowers isn’t just for expert gardeners with fancy setups. You can harvest seeds at home, no special tools or lab coats needed. It’s a hands-on way to make your garden personal, save some money, and keep growing flowers you love. The reasons for collecting seeds are simple, but they make a big difference for gardeners like us.
Grow Your Favorite Flowers
Some flowers are hard to find once they disappear from nurseries. Collecting seeds lets you grow the exact bloom you fell in love with last summer. Every season, you keep the colors and shapes you like best.
- Keep rare or heirloom varieties alive in your yard.
- Re-grow flowers that have personal meaning to you.
- Share special seeds with friends and neighbors so they can enjoy them, too.
Support a Sustainable Garden
Collecting seeds is one of the easiest ways to make your garden greener. Instead of depending on commercial growers, you can create a mini ecosystem right at home.
When you collect seeds, you:
- Cut down on plastic seed packets and shipping waste.
- Encourage plants to adapt to your local conditions over time.
- Be part of keeping gardens more natural and self-sustaining.
A single handful of seeds can start the whole flower life cycle again, with less waste and fewer resources needed.
Build Your Gardening Skills
Seed collecting connects you to every part of your garden’s story. You’ll watch closely as flowers mature and dry, noticing how each plant grows and changes.
This hands-on learning builds confidence. You’re not just following a set of steps—you’re deciding which plants to collect seeds from, and figuring out what works for your space.
Collecting seeds turns you into a more observant, thoughtful gardener. You’ll spot patterns and pick up on what your plants need without always having to look things up.
Help Butterflies, Bees, and Birds

Gardens grown from saved seeds often support local insects and wildlife. Native and heirloom flowers give pollinators like bees and butterflies reliable food sources. You’ll be helping build a welcoming garden community, without even having to try that hard.
Types of Plants that attract butterflies
When you collect seeds, you’re not just growing flowers—you’re growing a healthier yard for everyone.
Timing: When Are Flower Seeds Ready to Collect?
Knowing when flower seeds are ready to collect takes a little patience and a sharp eye. If you pick too early, the seeds might not grow. Wait too long, and the wind or birds might steal them first. To have the best chance at healthy new plants, you need to watch for some easy signs that seeds are ready to gather.
Signs Seeds Are Ripe
There are a few clues you can use to spot when flower seeds are good to collect. Look for these on your favorite plants:
- Seed pods turn brown or tan: Bright green pods are still growing, but once they start drying and change color, the seeds inside are likely mature.
- Pod or flower head feels dry: Rattle the pod gently. If it sounds hollow or the pod feels brittle, the seeds are close to ready.
- Seeds separate easily: If you can tap the pod and seeds start to fall out, it’s a sign the plant has finished its job.
- Feathery or papery heads appear: Some flowers, like dandelions, form fluffy seed heads when seeds are mature. Sunflowers get dry, and the seeds feel loose in their centers.
Common Flower Examples
Each plant is a little different. Here’s what to look for with some popular flowers:
- Marigolds: Wait until the flower head is brown, and you can see the thin black seeds. Pull apart the dried head to collect seeds.
- Sunflowers: Look for a very dry flower face, with big, striped seeds starting to fall out if you tilt the head.
- Poppies: Watch for pods that have turned beige and rattle with seeds inside. If you shake the pod and hear seeds, they’re ready.
- Cosmos and Zinnias: The petals drop off, and you’ll see thick, pointy seeds left behind. Once those are dry and dark, collect seeds.
What Happens If You Wait Too Long?
Sometimes, life gets busy and we forget to collect seeds right away. If you wait too long, you might notice:
- Pods splitting open and spilling seeds
- Seeds blowing away or eaten by birds
- Rain is causing seeds to mold or sprout where you don’t want them
Try to check your plants every few days at the end of the season. If you catch those small color changes and dry sounds, you’ll collect seeds at just the right moment.
Quick Checklist for Collecting Seeds
To help you remember, here’s a short list to keep handy:
- Wait for seed pods or flower heads to lose their bright color.
- Feel for dryness or listen for a rattle.
- Collect seeds on a dry day.
- Store seeds quickly so they don’t soak up moisture.
By learning these signs, you’ll soon feel confident about when to collect seeds. This is how you keep your favorite flowers going year after year!
Step-by-Step Guide: How to Collect Seeds from Popular Flower Types
Ready to collect seeds and keep your garden full for next year? Every flower has its own clues for when and how to gather seeds. Here’s how you can collect seeds from some of the most loved garden flowers—marigolds, sunflowers, poppies, and zinnias. With a bit of patience, you’ll have your own stash ready for planting, trading, or gifting.
Marigolds: Provide detailed steps on collecting seeds from marigold flowers
Marigolds are one of the easiest flowers to collect seeds from, making them perfect for beginners. They reward you with plenty of seeds if you know what to look for.
Steps to collect seeds from marigolds:

- Wait for the marigold blooms to dry out on the plant. The petals will shrivel, and the flower head will turn brown and crunchy.
- Snip off the dried flower head with a pair of scissors or pull it off by hand.
- Hold the dried head over a plate or bowl and pull it apart gently with your fingers.
- Inside, you’ll find dozens of thin, black seeds attached to the base. The seeds look just like little black splinters with a yellow tip.
- Let the seeds air dry on a paper towel for a day or two, especially if it’s humid.
- Store your dry marigold seeds in a paper envelope or a glass jar, label with the date, and keep in a cool, dry place.
You’ll likely get far more marigold seeds than you need, so feel free to share with friends or sprinkle extras in your garden next year.
Sunflowers
Sunflowers make seed collecting fun, with their large heads and chunky seeds. It’s almost like nature’s own snack dispenser.

Steps to collect sunflower seeds:
- Let your sunflower heads stay on the plant until the back of the head turns yellow then brown and feels dry.
- Birds may start visiting for the seeds. If you want to beat them to it, cover the fading flower head with mesh or a paper bag.
- Cut the head from the stalk, leaving about a foot of stem, so it’s easy to handle.
- Hang the sunflower upside down in a dry, airy place for another week or two.
- Once fully dry, rub your hand over the seeds to loosen them from the center.
- Pick out any stray petals and let the seeds air dry for a few more days.
- Store the seeds in a paper bag or envelope for best results. They’ll be ready for planting or eating next season.
Poppies
Poppies hide their seeds in nifty little pods, making collecting almost like a treasure hunt.
How to collect poppy seeds:

- Wait for the flower petals to fall away, revealing a fat, oval-shaped seed pod.
- Leave the pod on the plant until it turns light brown and rattles when you gently shake it.
- Cut the dried pod off with scissors.
- Hold the pod upside down over a bowl or envelope. Tap it or roll it gently between your fingers—tiny black seeds will spill out from holes just below the cap of the pod.
- If some seeds are stuck, break open the pod.
- Let the seeds dry for another day or two on a paper towel, then store them away.
Poppy seeds are super tiny, so work carefully and store them in a packet you can seal up tight.
Zinnias
Zinnias are just as easy as marigolds and give loads of seeds in every bloom.

Steps for collecting zinnia seeds:
- Let the flower head dry completely on the plant. The petals will shrivel, and the head will turn brown and crispy.
- Cut the dried flower head and pull it apart with your fingers.
- Inside, you’ll find the seeds attached to the base of each brittle petal. Zinnia seeds are arrow-shaped and tan or gray.
- Spread the seeds out to air dry for a day or two, especially if they feel damp.
- Store in a labeled envelope or jar until you’re ready to replant.
Collecting zinnia seeds is quick and gives you plenty for next year’s flower bed. You might even spot differences in color and shape if you collect from mixed varieties.
Cleaning, Drying, and Storing Flower Seeds
After you collect seeds from your favorite flowers, taking care of them the right way matters if you want them to last until next season. Seeds are a lot like food—they can go bad if left dirty or damp. By following a few simple steps to clean, dry, and store your seeds, you’ll boost their chances of growing into healthy new blooms. Let’s break down what you need to do after you gather seeds.
Cleaning Flower Seeds
Most seeds don’t come out of the pod or flower head completely clean. They often stick to petals, pods, or bits of plant called chaff. Chaff can keep seeds damp and lead to mold or rot in storage. Cleaning is your first job after collecting.
Here’s how to clean your seeds:
- Pour collected seeds onto a white plate or shallow tray. This helps you see both seeds and extra plant parts.
- Pinch or rub the seeds with your fingers to separate them from petals, casings, or fluff.
- If the seeds are small or have lots of chaff, blow gently across the dish to help the lighter bits float away—do this outside to avoid a mess.
- For tough chaff, use tweezers or a fine mesh strainer to separate seeds from the debris.
Take your time with this step. Clean seeds store better and are less likely to grow mold later on.
Drying Seeds to Prevent Mold
Seeds must be fully dry before you store them, or they could spoil. Even if seeds look dry, moisture might be hiding inside.
Easy drying steps:
- Spread seeds in a single layer on a paper towel, coffee filter, or plate. Don’t pile them up; give them room.
- Keep the seeds in a dry, shaded spot with good air flow. Avoid direct sunlight, which can hurt seed quality.
- Let the seeds sit for at least 5-7 days. Turn them once a day to help them dry evenly.
Signs your seeds are dry:
- They feel hard, not squishy.
- They break instead of bending when you press them.
Dry seeds are less likely to rot and will store longer, so don’t rush this step.
Storing Seeds for Next Season
Storing seeds is all about keeping them dry, cool, and out of light. Moisture and warmth can ruin your hard work.
Some good storage options include:
- Paper envelopes: These let seeds breathe and don’t trap moisture inside.
- Small glass jars: Mason jars or spice jars also work, but only if you’re sure seeds are dry.
- Plastic bags: Only use these for seeds you’re planting soon, as plastic can hold in leftover moisture and cause mold.
Key tips for better seed storage:
- Add a little packet of dry rice or silica gel to help soak up any extra moisture.
- Store your packets and jars in a cool, dark place like a basement, closet, or refrigerator.
Labeling and Organizing Your Seeds
Once your seeds are clean and dry, don’t forget to label and organize them. It’s easy to forget which seeds are which, especially after a few months.
Be clear and specific on your labels:
- Write the plant type and variety. For example: “Zinnia, Salmon Rose, 2024.”
- Add the date you collected the seeds.
- Optional: Note where the plant grew, in case you want to remember the best spots in your yard.
To keep your seed collection tidy:
- Store all envelopes in a shoebox, recipe box, or small bin.
- Use paper dividers or index cards to separate seeds by flower type.
- Keep a simple notebook or spreadsheet if you like tracking your seed stash over time.
Clean, dry, and well-labeled seeds give you a head start on a thriving garden next year. If you follow these simple steps every time you collect seeds, you’ll make the most of your garden’s best flowers—without any guesswork or wasted effort.
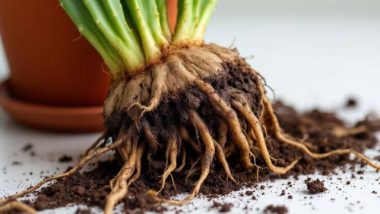
Tips for Successfully Growing Flowers from Collected Seeds
Growing flowers from seeds you collected brings an extra layer of satisfaction to gardening. It’s not just about saving a few bucks—it’s about seeing your favorites return and knowing you helped every step of the way. Even if you’re new to gardening, a few simple habits will help you get strong sprouts and cheerful blooms from the seeds you saved. Here’s how to give your plants the best start.

Photo by Greta Hoffman
Preparing Your Soil Like a Pro
Good soil can mean the difference between weak sprouts and strong, happy plants. Before you even think about planting, focus on what’s under your feet.
- Loosen the soil: Use a trowel or a small fork to break up any clumps. This helps roots grow deep and wide.
- Mix in compost: A couple of handfuls of compost or leaf mold adds food to the soil and helps it hold water.
- Remove weeds and rocks: Give your seeds a clear space to grow, so they don’t have to fight for room and light.
- Water it in: Moisten the soil with a gentle shower before planting. This makes it easier for seeds to soak up what they need.
If your garden soil is heavy (clay) or super sandy, add compost until it feels crumbly in your hand, almost like the top of a chocolate cake.
Planting Seeds: How Deep and How Far?
Different flowers like different planting spots. Most seeds you collect from annuals or perennials do best with these simple steps:
- Check the size: Smaller seeds sit right on top of the soil, while larger seeds need to be under a bit of dirt.
- Follow the rule: Plant seeds at a depth about two times their thickness. Super tiny seeds just need to be pressed into the soil.
- Give them space: Scatter your seeds or lay them in neat rows. Don’t pile them—crowded seeds fight for light and air.
- Cover (or not): Gently press down or add a sprinkle of soil. Use your hand or the flat end of a trowel.
- Label your rows: Add a marker with the flower name and collection date to avoid a jumble later.
Once you’re done, mist the area with a fine spray so you don’t wash the seeds away.
Mistakes to Avoid When You Collect Seeds and Grow
A few common problems can keep even well-collected seeds from sprouting. Spot them early and you’ll get a better show of blooms:
- Planting too deep: Buried seeds can rot or never break through the soil.
- Not watering enough (or too much): Seeds need steady moisture. Water when the soil feels dry to your finger. Don’t let seeds sit in puddles.
- Skipping sunlight: Most flower seeds need a warm spot with lots of light to start growing. Without it, they sit and sulk.
- Letting weeds take over: Weeds sneak in quick and can crowd your seedlings. Check your rows every few days.
If you have sprouts but they flop over, the spot may be too dark or wet. Move your containers or thin out crowded seedlings right away.
Extra Tricks for Better Growth
Here are a few more tricks that help your collected seeds jumpstart:
- Soak hard seeds: Some big seeds (like morning glory or sweet pea) germinate faster if you soak them in water overnight before planting.
- Tough hull? Scarify: If seeds have a very tough shell, lightly scratch them with sandpaper to help them sprout.
- Start indoors: If you want earlier blooms or live where spring is short, use small pots on a bright windowsill.
Use these tips, and you’ll soon see shoots from the seeds you collected, all lined up and ready to fill your garden. Each step lets you control what grows, and keeps your flower beds blooming without having to visit the store each year.
Conclusion
Collect seeds from your own flowers and you set yourself up for a garden that gets better each year. You save money, grow the exact flowers you love, and help your space support pollinators and birds. Every time you collect seeds, you pick up new skills and notice more in your garden.
Start collecting seeds this season and see how much fun it is to share your homegrown flowers and swap seeds with friends. The little bit of effort now gives you brighter blooms, a fuller garden, and plenty of reasons to look forward to next spring.
Thanks for reading and being part of a community that keeps special flowers growing. If you have your own tips or favorite flowers to collect seeds from, share them below so we can all learn together.

Greenhouse Manager, Master Gardener, and Webmaster.
If you have any questions or enjoyed this post, feel free to share your thoughts in the comments below.