Last updated on July 16th, 2026 at 06:48 pm
How to Propagate Native Plants
Propagating native plants is a rewarding hobby for many people. It’s an essential way to support biodiversity and promote healthy ecosystems. These plants are perfectly adapted to your local environment, making them a low-maintenance and sustainable choice for gardening and landscaping. By learning how to propagate native plants, you can help preserve them for future generations while creating a thriving habitat for local wildlife.
List of Desert Southwest Native Plants
The Desert Southwest is known for its unique and hardy flora adapted to arid conditions. Below is a carefully curated list of native plants, each playing a critical role in the local ecosystem.
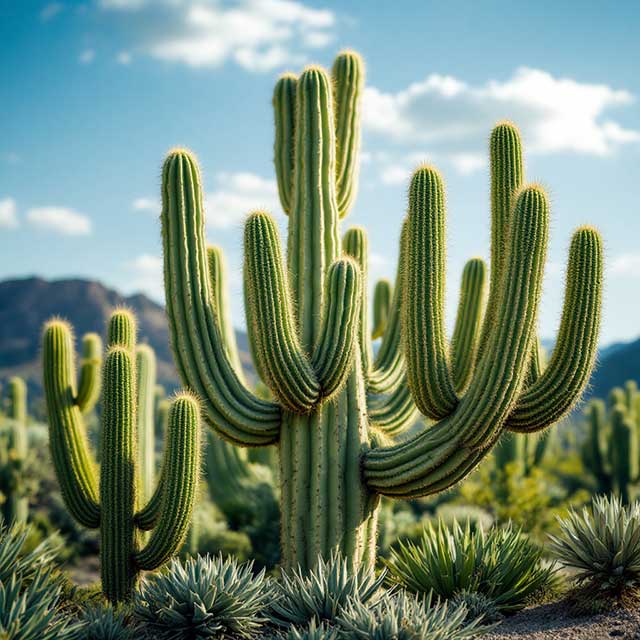
1. Saguaro Cactus (Carnegiea gigantea)
- Iconic to the Sonoran Desert, the saguaro can live for over 150 years.
- Grows up to 40 feet tall and stores water in its expandable ribs.
- Flowers bloom in late spring and are an important nectar source for bats, birds, and bees.
How to Propagate a Saguaro Cactus
Saguaros (Carnegiea gigantea) are normally propagated from seed. Growing one is rewarding, but it requires patience—the National Park Service reports that a saguaro may grow only 1 to 1½ inches during its first eight years. Learn how saguaros grow.
Starting Saguaro Seeds
- Purchase seeds from a reputable nursery.
Do not collect fruit, seeds, or plant material from wild saguaros without permission. Saguaros and their plant parts are protected under Arizona law. Arizona Native Plant Law. - Prepare the container.
Use a shallow pot or seed-starting tray with drainage holes. Fill it with a sterile cactus mix or a mixture of:- Two parts coarse sand or fine pumice
- One part potting soil
- Sow the seeds on the surface.
Sprinkle the tiny seeds across the moist soil. Press them gently into the surface, but do not bury them deeply. Cover them with a very thin layer of fine sand. - Cover the container.
Place clear plastic wrap or a transparent lid over the container. This keeps the humidity steady while the seeds germinate. - Provide warmth and filtered light.
Keep the container in a bright location without direct afternoon sunlight. A temperature between approximately 75°F and 85°F works well. - Keep the soil lightly moist.
Mist the surface as needed. It should remain damp, but never soggy. Too much water can cause the seedlings to rot. - Gradually remove the cover.
Once seedlings appear, begin opening the cover for a short time each day. Gradually increase the ventilation over several weeks. - Transplant carefully.
Wait until the seedlings are large enough to handle safely—often after a year or longer. Transfer each one into a small pot with fast-draining cactus soil.
Saguaros are native to the warmer Sonoran Desert and rarely grow in Las Cruces, NM.
2. Creosote Bush (Larrea tridentata)
- Found across the Mojave, Sonoran, and Chihuahuan deserts.
- Known for its resinous, aromatic leaves that release a “rain smell” after storms.
- Its deep roots make it exceptionally drought-tolerant.
Growing from Seed (Best Method)
This is the most reliable way to propagate creosote bush.
-
- Collect ripe, fuzzy white seed capsules in late spring or early summer.
- Remove the seeds from the fuzzy coating.
- Soak the seeds in warm water for 12 to 24 hours before planting.
- Fill pots with a well-drained cactus or sandy soil mix.
- Plant the seeds about ¼ inch deep.
- Place the pots in a warm, sunny location.
- Keep the soil slightly moist until germination. Once seedlings appear, reduce watering and allow the soil to dry between waterings.
3. Ocotillo (Fouquieria splendens)
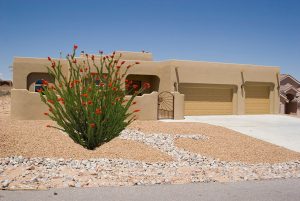
- A spiny shrub-like plant with long, whip-like stems.
- Produces clusters of vibrant red flowers after heavy rains.
- Its stems can appear lifeless but regenerate leaves quickly when watered.
How to Propagate Ocotillo
Ocotillo (Fouquieria splendens) can be propagated from seed or stem cuttings. Stem cuttings are faster, but they do not always root successfully. Growing from seed takes longer but usually produces a stronger, more naturally shaped plant.
Propagating Ocotillo from Cuttings
Take your cutting during the warm growing season, preferably in late spring or early summer.
- Select a healthy, mature cane without signs of damage or disease.
- Cut a section approximately 3 to 6 feet long using clean, sharp pruning tools.
- Mark the bottom so you do not accidentally plant the cutting upside down.
- Allow the cut end to dry in a shaded location for several days.
- Plant the bottom 6 to 12 inches deep in sandy, extremely well-draining soil.
- Firm the soil around it and stake the cane if it moves in the wind.
- Water lightly, then allow the soil to dry before watering again.
Keep the soil slightly moist—but never soggy—while roots develop. Rooting may take several months, and some cuttings will produce leaves before developing a dependable root system. New leaves alone do not prove that the cutting has rooted.
Propagating Ocotillo from Seed
Fresh seed generally gives you the best germination.
- Fill a shallow container with cactus mix or a mixture of sand, perlite, and a small amount of potting soil.
- Scatter the seeds over the surface.
- Press them lightly into the soil and cover them with only a very thin layer of sand.
- Mist gently and place the container in bright, indirect light.
- Keep the mix slightly moist until the seeds germinate.
- Gradually reduce watering as the seedlings become established.
Protect young plants from intense afternoon sun. Move them into individual containers after they are large enough to handle safely.
Ocotillos naturally grow in rocky, fast-draining desert soil and produce leaves whenever sufficient moisture is available. Once established, they should not be watered like ordinary shrubs. Overwatering is much more dangerous than allowing the soil to dry. Arizona-Sonora Desert Museum
Only collect canes or seeds from plants you own or have permission to use. Never remove an ocotillo or its parts from public land.
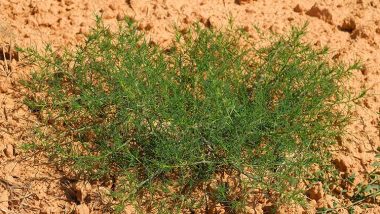
4. Desert Marigold (Baileya multiradiata)
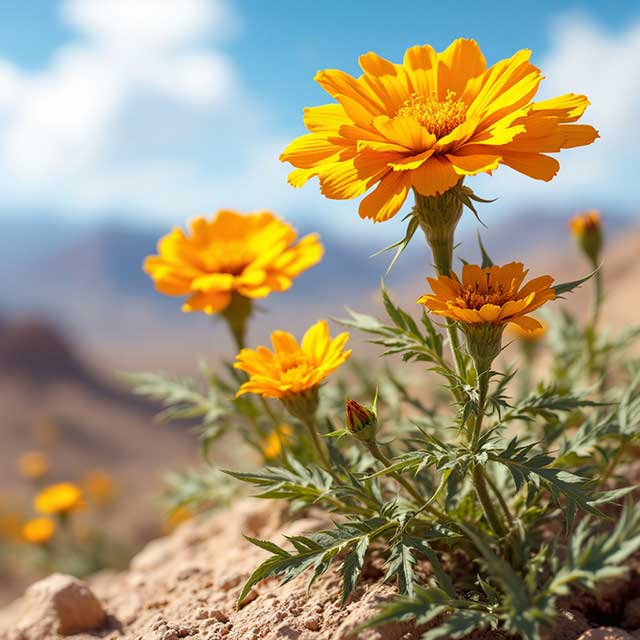
- A perennial wildflower with bright yellow, daisy-like blooms.
- Thrives in sandy, rocky soils and blooms nearly year-round.
- Often used in xeriscaping for its low maintenance needs.
How to Propagate Desert Marigold
Desert Marigold (Baileya multiradiata) is easiest to propagate from seed. It readily reseeds itself when growing in loose, well-draining soil.
Collecting the Seeds
Allow several flower heads to remain on the plant after the yellow petals fade. Once the heads turn brown and feel dry, cut them from the plant and place them in a paper bag. Gently break the heads apart to release the seeds.
Store the seeds in a cool, dry place until you are ready to plant.
Planting Outdoors
In Las Cruces and other parts of the Desert Southwest, sow the seeds in fall or early spring. Fall planting exposes them to naturally cool, moist conditions, which can improve germination.
- Choose a sunny location with sandy or gravelly soil.
- Loosen the top inch of soil.
- Scatter the seeds over the surface.
- Press them gently into the soil.
- Cover them with no more than about ⅛ inch of fine soil or sand.
- Water gently so you do not wash the seeds away.
Keep the planting area slightly moist until seedlings appear. Once established, reduce watering and allow the soil to dry between applications.
Starting Seeds in Containers
Use small containers filled with cactus mix or another fast-draining seed-starting mixture. Sow two or three seeds in each container and barely cover them. Place the containers in bright light and keep the soil slightly moist—not saturated.
Once the seedlings develop several true leaves, thin them to one plant per container. Transplant them carefully because Desert Marigolds do not appreciate excessive root disturbance.
Improving Germination
Seeds can germinate without special treatment, but exposure to cool, moist conditions may improve the results. The University of Arizona found that cold stratification increased Desert Marigold germination from approximately 5% to 25%. University of Arizona Cooperative Extension
To cold-stratify the seeds, place them in slightly damp sand inside a sealed bag and refrigerate them for approximately four weeks before planting.
Avoid rich soil, heavy clay and frequent watering. Desert Marigolds perform best in full sun and lean, fast-draining soil. Too much water can cause the crown or roots to rot.
5. Prickly Pear Cactus (Opuntia spp.)
- Recognized for its flat, paddle-shaped pads armed with spines.
- Pads (nopales) and fruit (tunas) are edible and widely used in recipes.
- Provides food and habitat for desert wildlife.
How to Propagate Prickly Pear Cactus
Prickly Pear Cactus (Opuntia) is easy to propagate from individual pads. For the best results, take your cutting during spring or early summer, when the plant is actively growing.
Choose and Remove a Healthy Pad
Select a mature, healthy pad without soft spots, discoloration or insect damage. Using thick gloves and long kitchen tongs, hold the pad securely and cut it at the joint where it connects to the parent plant.
Be careful of the tiny hair-like spines called glochids. They detach easily and can be difficult to remove from your skin.
Let the Cutting Form a Callus
Place the pad upright in a dry, shaded location with good air circulation. Allow the cut end to dry and form a firm callus. This normally takes about 7 to 14 days.
Do not plant a freshly cut pad. The open wound can absorb moisture and develop rot.
Plant the Pad
Use cactus soil or create a fast-draining mixture using native soil, coarse sand, pumice or perlite.
- Insert the callused end approximately 1 to 2 inches into the soil.
- Firm the soil around the pad without burying it too deeply.
- Use rocks or a small stake to hold it upright if necessary.
- Place a container-grown cutting in bright light with protection from intense afternoon sun.
Do not water immediately after planting. Wait approximately one week, then water lightly. Allow the soil to dry completely before watering again.
How Long Does Rooting Take?
A Prickly Pear pad may begin producing roots within several weeks, although cooler conditions can slow the process. After four to six weeks, gently tug on the pad. Resistance usually means that roots are developing.
Once the pad is firmly rooted, gradually expose it to more sunlight. New pads commonly appear from the upper areoles during the active growing season.
The most common reason Prickly Pear cuttings fail is excessive moisture. Never place the pad in soggy soil or water it on a regular schedule. It needs excellent drainage and time to dry between waterings.

6. Palo Verde (Parkinsonia spp.)
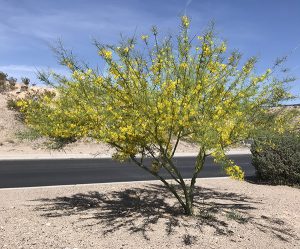
- A small deciduous tree with green bark for photosynthesis.
- Produces small yellow flowers in spring, attracting pollinators.
- A keystone species providing shade and shelter for other desert plants.
7. Mesquite Trees (Prosopis spp.)
- Hardy trees with deep roots that access underground water.
- Seed pods are rich in protein and have been a food source for indigenous peoples.
- Serve as natural nitrogen fixers, enriching surrounding soil.
How to Propagate Mesquite Trees
Mesquite trees (Prosopis spp.) are most easily propagated from seed. The seeds have an exceptionally hard outer coating that allows them to survive in the desert for many years. You will need to break or weaken this coating before planting.
Collecting Mesquite Seeds
Collect mature seedpods during summer after they have turned tan or light brown and become dry. Avoid pods with small holes because they may contain seed beetles.
Break the pods open and remove the hard seeds. Seeds can be difficult to separate from the tough pod material, so use pliers carefully if necessary.
Scarifying the Seeds
Mechanical scarification is the safest and most reliable treatment for home gardeners.
- Hold the seed securely with pliers.
- Rub one side against coarse sandpaper or a small file.
- Stop when a small, lighter-colored spot becomes visible beneath the outer coating.
- Avoid cutting deeply enough to damage the seed inside.
- Soak the scarified seeds in room-temperature water overnight.
Seeds that absorb water and swell are ready to plant. If a seed remains unchanged, carefully scarify it again.
A hot-water treatment can also work, but results vary. Pour very hot water over the seeds, allow it to cool and soak them for 12 to 24 hours. Mechanical scarification is generally more dependable.
Planting Mesquite Seeds
- Fill a deep container with sandy, well-draining potting soil.
- Plant each seed approximately ½ to ¾ inch deep.
- Water thoroughly and allow the excess water to drain.
- Place the container in a warm location with bright light.
- Keep the soil slightly moist but never saturated.
Treated seeds can begin germinating within several days. The USDA Forest Service reports germination rates of 94% to 100% for mechanically scarified Velvet Mesquite seeds under controlled conditions. USDA Forest Service
Caring for Mesquite Seedlings
Mesquite seedlings quickly develop long taproots. Use tall, narrow containers that provide plenty of downward growing space. A shallow pot can cause the taproot to circle or become stunted.
Place young seedlings in bright light and gradually introduce them to direct sun. Allow the upper portion of the soil to dry slightly between waterings. Do not keep the containers constantly wet.
Transplant the seedlings while they are still relatively young, before their roots become crowded. Handle the root ball carefully and avoid breaking or bending the taproot.
Mesquite trees grown from seed may differ somewhat from the parent tree, especially where Honey, Velvet and other mesquite species grow close enough to cross-pollinate. Propagation from young green cuttings is possible, but it generally requires controlled humidity and is much less dependable for home gardeners.

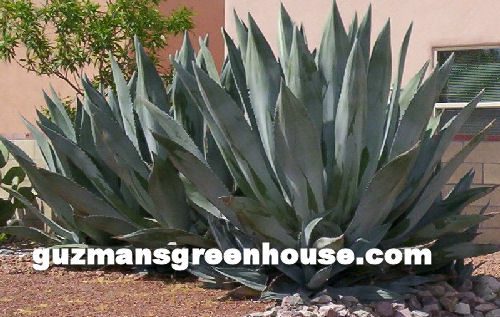
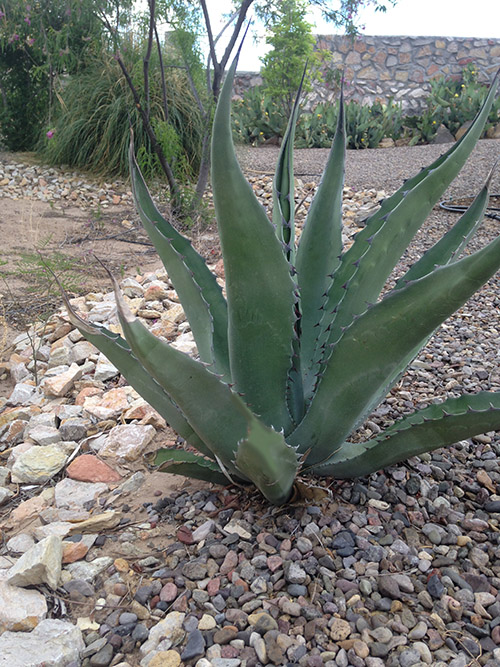
8. Agave (Agave spp.)
- Known for its sharp leaves and rosette shape. Also called the Century Plant.
- Flowers once in their life, producing a towering stalk before dying.
- Used for tequila production and in traditional medicine.
How to Propagate Agave
Agaves (Agave spp.) can be propagated from offsets, bulbils or seeds. Removing offsets—commonly called pups—is the easiest and most dependable method for home gardeners. It also produces a new plant with the same characteristics as the parent.
Propagating Agave from Offsets
Many Agaves produce small plants around the base or along underground runners. Allow an offset to grow several inches tall before removing it. Larger offsets with some roots already attached establish more quickly.
- Wear thick gloves, long sleeves, and eye protection.
- Carefully move the surrounding soil away from the offset.
- Locate the runner, connecting it to the parent plant.
- Cut the runner with a clean, sharp knife or pruning tool.
- Preserve as many roots as possible.
- Place the offset in a dry, shaded location for several days so the cut can form a callus.
Agave sap can irritate your skin, so wash exposed skin and tools after handling the plant.
Planting the Offset
Plant the offset in cactus mix or sandy, fast-draining soil. Position it at approximately the same depth at which it was previously growing. Do not bury the crown or base of the leaves.
Wait about five to seven days before watering. This gives any damaged roots additional time to heal. Afterward, water lightly and allow the soil to dry completely before watering again.
Place newly planted offsets in bright light with temporary protection from intense afternoon sun. Gradually expose them to full sun as their roots become established.
Propagating Agave from Bulbils
Some Agave species produce small plantlets called bulbils on their flowering stalks. Wait until the bulbils are several inches long and detach easily.
Remove them carefully and allow their bases to dry for a few days. Plant them shallowly in small containers filled with cactus soil. Keep them in bright, indirect light and water sparingly until roots develop.
Growing Agave from Seed
Allow the seed capsules on a flowering stalk to mature and dry before collecting them. The capsules will begin splitting open when the seeds are ready.
- Fill a shallow container with sterile cactus or seed-starting mix.
- Place the seeds on the surface.
- Cover them with a very thin layer of sand or fine soil.
- Mist the surface gently.
- Keep the container warm and in bright, indirect light.
- Maintain slight moisture until germination occurs.
Once the seedlings are established, gradually reduce watering. Transplant them into individual containers when they are large enough to handle safely.
Agaves grown from seed can vary from the parent plant, particularly when different species or cultivated varieties grow nearby. Use offsets when you want to preserve the exact color, shape or variegation of a named variety.
Most Agave rosettes flower only once and then die, but offsets or bulbils often continue growing and replace the original plant. The genus is native to the dry regions of the Americas and includes numerous species adapted to Southwest landscapes. Arizona-Sonora Desert Museum
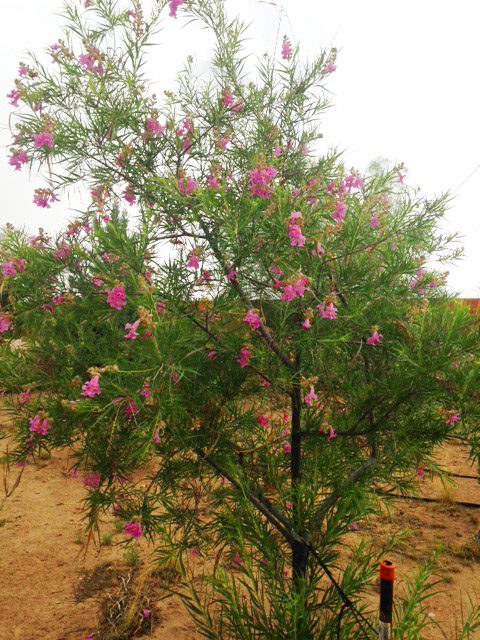
9. Desert Willow (Chilopsis linearis)
- A deciduous shrub or small tree with long, slender leaves.
- Produces pink, trumpet-shaped flowers in summer, attracting hummingbirds.
- Often planted for shade and erosion control.

How to Propagate Desert Willow
Desert Willow (Chilopsis linearis) can be propagated from seeds or stem cuttings. Seeds are generally the easiest option, but cuttings should be used when you want the new tree to retain the flower color and other characteristics of a named variety.
Although its common name includes “willow,” Desert Willow is not a true willow. It belongs to the trumpet-vine family.
Propagating Desert Willow from Seeds
Desert Willow produces long, narrow seedpods following its flowers. Allow the pods to remain on the tree until they turn brown, dry out, and begin to split open.
Collect the pods before all the seeds are released. Open them carefully and remove the flat, winged seeds.
Planting the Seeds
Fresh seeds normally do not require scarification or cold treatment.
- Fill a deep container with a loose, fast-draining potting mixture.
- Place the seeds flat on the surface.
- Cover them with approximately ¼ inch of soil.
- Water gently to settle the soil.
- Place the container in a warm location with bright light.
- Keep the soil slightly moist until germination occurs.
The seeds often germinate within one to three weeks when conditions are warm. Once seedlings appear, give them plenty of light to prevent weak, stretched growth.
Desert Willow seedlings develop roots quickly. Move them into individual, deeper containers before their roots become crowded.
Propagating Desert Willow from Cuttings
Take softwood or semi-hardwood cuttings during late spring or early summer.
- Select a healthy, nonflowering branch.
- Cut a section approximately 6 to 8 inches long.
- Remove the leaves from the lower half.
- Dip the cut end into rooting hormone.
- Insert it about 2 inches deep into a mixture of perlite and coarse sand or sterile potting mix.
- Water the mixture and allow the excess water to drain.
Keep the cutting in bright, indirect light. Maintain moderate humidity around the foliage, but do not keep the rooting mixture soggy. A clear plastic covering can help retain moisture, but it should not touch the leaves. Open it regularly to allow fresh air to circulate.
Roots may begin developing in several weeks. Once the cutting produces new growth and resists a gentle tug, gradually remove the covering and expose it to brighter light.
Which Method Should You Use?
Use seeds when you want an inexpensive way to grow several trees and do not mind variations in flower color or growth habit.
Use cuttings to reproduce a named Desert Willow variety. Seedlings from cultivars such as ‘Bubba,’ ‘Burgundy’ or ‘Art’s Seedless’ may not look or perform exactly like their parent.
Young Desert Willows need regular moisture while establishing, but mature trees perform best in full sun and well-draining soil. Avoid constantly wet soil, which can produce weak growth and root problems. The species is native to desert washes and drainage areas across the Southwest. USDA Desert Willow Plant Guide
10. Yucca (Yucca spp.)
- Features spiky leaves and tall flowering stalks.
- Pollinated exclusively by yucca moths, showcasing a unique co-evolution relationship.
- Root systems help stabilize soil in windy desert environments.

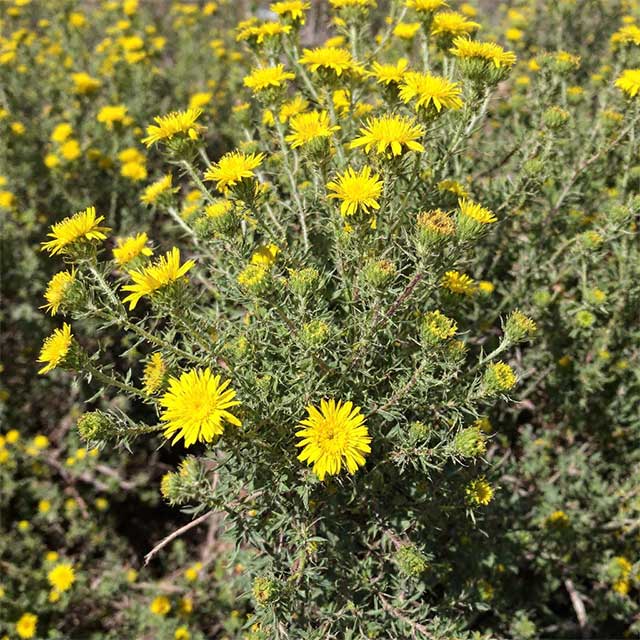
11. Brittlebush (Encelia farinosa)
- A gray-green shrub produces clusters of small yellow flowers in spring.
- Leaves are highly reflective, reducing water loss by deflecting sunlight.
- The sticky resin was used historically as glue and incense.
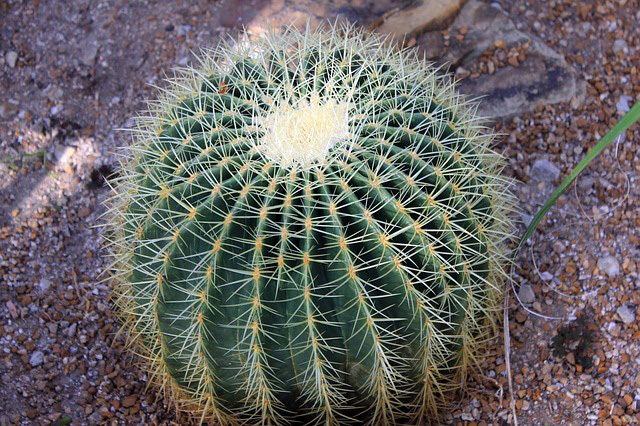
12. Barrel Cactus (Ferocactus spp.)
- Known for its cylindrical shape and prominent ribs.
- Stores water and can reach up to 6 feet tall.
- Native peoples used its pulp for emergency hydration during droughts.
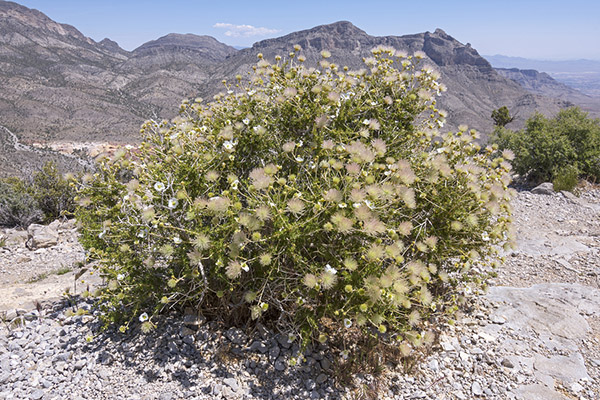
13. Apache Plume (Fallugia paradoxa)
- A shrub with feather-like seed heads resembling “plumes.”
- Grows well in rocky soils and survives with minimal water.
- Provides food and cover for small mammals and birds.
14. Jojoba (Simmondsia chinensis)
- A drought-adapted shrub with waxy leaves.
- Produces seeds rich in oil, widely used in cosmetics and skincare.
- Thrives in high heat, making it a cornerstone of desert agriculture.
More in information on this plant here. Jojoba Plant
Some things to consider
Desert Southwest native plants are not just survivors but essential elements of the ecosystem. They conserve water, protect soil, and support wildlife. Planting these species in your landscape benefits the environment while reducing maintenance and water use. Their resilience and beauty remind us of the incredible adaptations found in nature.
Understanding Native Plants
Before diving into propagation methods, it’s important to understand what native plants are and why they matter. Native plants have evolved over thousands of years to thrive in specific regions, making them key players in maintaining eco-balance.
Definition of Native Plants
What are Native plants? Native plants are species that naturally occur in a specific area without human introduction, typically based on geographical and climatic conditions. They provide essential food and shelter for local wildlife, from pollinators like bees and butterflies to birds and small mammals. Their ability to thrive without extra care, such as fertilizers or pesticides, makes them an environmentally friendly choice.
How to Propagate Native Plants
There are several ways to propagate native plants, depending on the species and resources available. Here’s a closer look at the most effective methods.
Seed Collection and Sowing
Seeds are one of the easiest and most accessible ways to propagate native plants. Start by collecting seeds from mature plants during their natural seeding period, typically in late summer or fall.
Not all Native Plants produce seeds, some produce spores and others such as hornworts will not produce seeds but propagte by vegetative reproduction.
Collecting Native Seeds
- Collect seeds: Look for pods, cones, or seed heads that are dry and ready to drop. Place them in a paper bag to dry further.
- Clean the seeds: Separate seeds from debris like husks or chaff.
- Prepare the soil: Native seeds usually germinate well in soil that mimics their natural conditions. A sandy or loamy mix often works best.
- Sow the seeds: Lay seeds on the soil surface and gently cover them with a thin layer of soil or sand. Make sure they’re spaced to allow room for growth. If sowing them in pots use cactus/succulent mix.
- Water lightly: Keep the soil moist but not soggy. Native seeds often require specific conditions to germinate, including temperature changes through the seasons.
Some native plant seeds may need “stratification,” a cold dormancy period, to trigger germination. To mimic this, refrigerate seeds for a few weeks before planting.
Cuttings and Division
For plants that don’t seed easily, cuttings and division are excellent alternatives.
- Cuttings: Take a 4-6 inch stem cutting from a healthy plant. Dip the cut end in rooting hormone (optional), then plant it in moist potting soil. Cover the pot with plastic wrap to create a mini-greenhouse, keeping humidity high while roots form.
- Division: Herbaceous plants, like grasses or perennials, can often be divided at the root. Use a spade or knife to separate clumps into smaller sections, ensuring each has roots attached. Replant these divisions into fresh soil.
Layering Techniques
Layering is another reliable way to propagate native plants—especially shrubs or groundcovers.
- Air Layering: Strip a small section of bark from a stem, wrap it with damp moss, and cover with plastic wrap. Once roots form, cut the stem below the new roots and plant it.
- Mound Layering: For shrubs, mound soil around the base of low branches to encourage rooting. Once roots develop, separate and plant the new individuals.
Caring for Propagated Native Plants
Once you’ve successfully propagated native plants, proper care is essential to ensure they thrive in their new environment.
Soil Requirements
Native plants are adapted to grow in specific soil types, so it’s crucial to match them to the right conditions. Some prefer sandy, well-drained soil, while others thrive in clay-rich areas. Research your species to provide the right foundation. Avoid adding too much fertilizer—native plants often do best in nutrient-poor soils. When in doubt use cactus mix for all Native Plants.

Watering and Fertilizing Practices
Newly propagated plants need more water initially to establish roots. However, once they’ve matured, many native plants require minimal watering. Water deeply but less frequently to encourage strong roots. Avoid chemical fertilizers, as they may disrupt the natural growth cycle of native species. Instead, opt for organic compost or let the soil’s natural nutrients do the work.
Pest and Disease Management
While native plants are generally resistant to local pests, they’re not immune. Aphids, slugs, and fungi might still appear. Use organic pest control methods, such as introducing beneficial insects like ladybugs or applying neem oil. Avoid chemical pesticides, which can harm pollinators and disrupt your garden’s ecosystem.
Environmental Factors
Sunlight, temperature, and water availability all play a role in propagation success. Make sure your plants have the right balance of sun and shade, and protect young seedlings from extreme conditions like frost or strong winds. If you’re in a drought-prone area, choose drought-tolerant native plants to reduce stress on water resources.
Image of more Native Plants

Conclusion
Propagating native plants allows you to play a significant role in supporting your local environment, all while creating a beautiful and sustainable garden. Whether you’re sowing seeds, taking cuttings, or experimenting with layering, each method gives you a hands-on way to nurture biodiversity in your own backyard.
Take the first step today—identify native plants in your area, collect seeds or cuttings, and begin your propagation journey. Not only will you help the environment, but you’ll also enjoy the unique beauty and resilience that native plants bring to your garden.
New to Southwest Gardening?
Stop wasting money on plants that will not survive our heat and drought.
My Southwest Gardening Made Simple eBook shows you which trees, shrubs, flowers, and vegetables actually thrive in New Mexico, Arizona, and West Texas.
The best plants for hot, dry climates
Common mistakes that kill Southwest plants
Easy-to-follow advice for beginners

Paul Guzman is a lifelong Southwest gardener and gardening writer with decades of experience helping homeowners grow beautiful landscapes in the desert Southwest. He writes for Guzman’s Garden Centers in Las Cruces, New Mexico, with contributing expertise from Gary Guzman, owner of Guzman’s Garden Centers. If you have any questions or enjoyed this post, feel free to share your thoughts in the comments below.